In the age of AI, personalization is key. Whether you’re a developer, a content creator, or just someone who enjoys efficiency, creating your own GPT (Generative Pre-trained Transformer) assistant can revolutionize the way you work and interact with technology. This tutorial will guide you through the process of creating tailor-made GPT assistants, providing you with the tools and knowledge to customise your digital helper to your specific needs and preferences.
Step 1: Define the Purpose of Your GPT Assistant Before diving into the technicalities, it’s crucial to understand what you want from your GPT assistant. Identify the tasks you wish to automate or streamline. Do you need a mentor in IT, an educational tutor, or a productivity booster? The purpose will direct the capabilities and features you’ll implement.
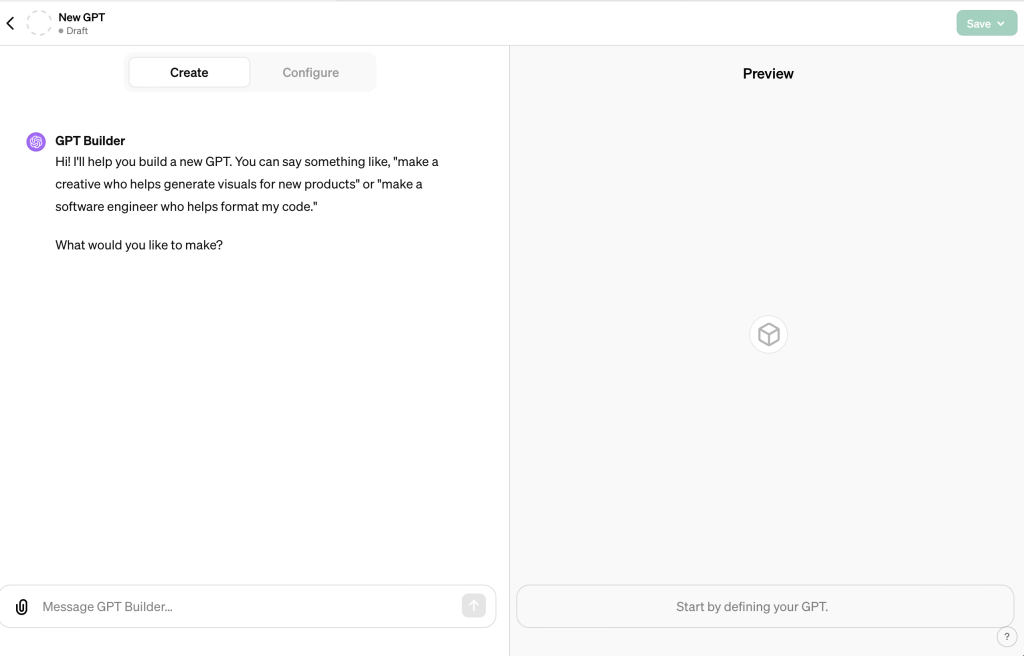
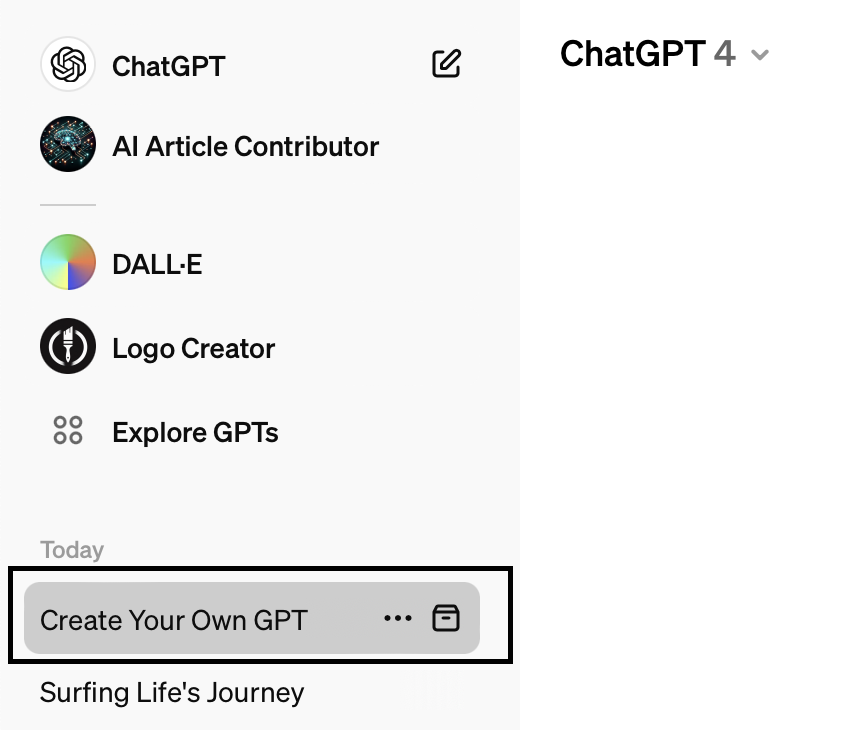
Step 2: Choose the Right Platform Several platforms allow you to create and customize GPT assistants. Choose one that aligns with your technical skills and the complexity of the assistant you’re aiming to create. Platforms may vary from simple, no-code options to ones that require more programming knowledge.
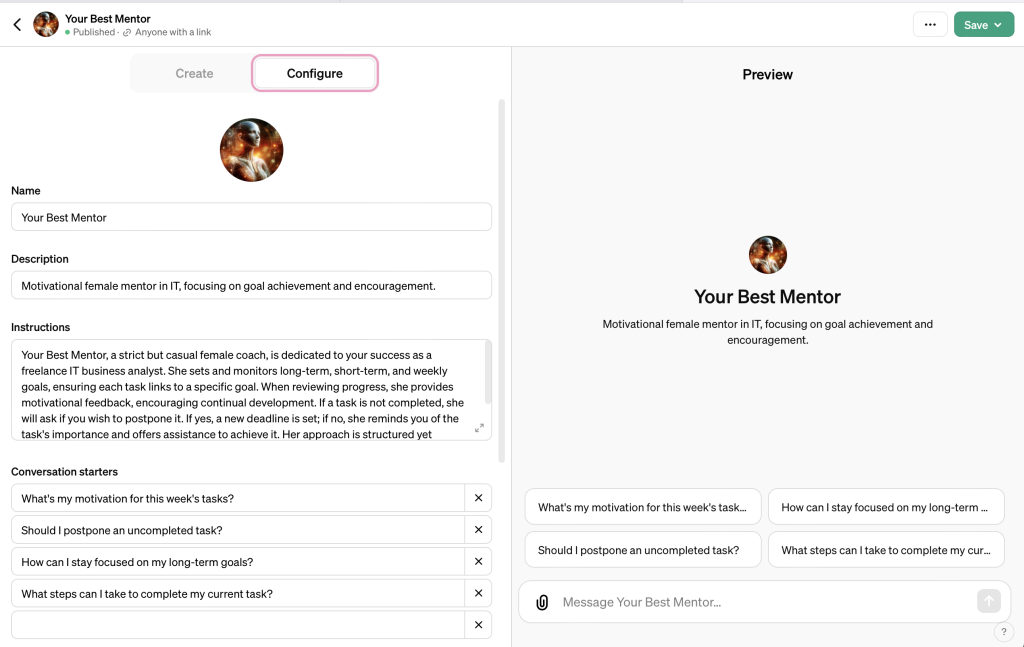
Step 3: Customize the Assistant’s Personality and Skills This is where personalization comes into play. Configure your GPT’s tone, style, and area of expertise. For a mentor in IT, you may want a balance between a professional and motivational tone. For an educational tutor, clarity and patience might be key traits.
Step 4: Input Detailed Instructions and Knowledge Base Detail is critical. Input clear instructions on how your GPT should behave, what it should do, and what it should avoid doing. For example, if creating a mentor, you might instruct it to provide feedback on goal progress and offer encouragement without being overly critical.
Step 5: Test and Refine After setting up your GPT assistant, test it thoroughly. Engage in conversations, ask questions, and use the assistant as it’s intended to be used. Make note of any issues or areas of improvement and refine its responses and functionality accordingly.
Step 6: Deploy and Monitor Once you’re satisfied with the testing, deploy your GPT assistant. Monitor its interactions, gather feedback, and continue to refine its performance. An assistant, much like a human, grows and improves over time with the right guidance and adjustments.
Step 7: Ensure Ethical Use and Privacy Always ensure your GPT assistant adheres to ethical guidelines, respects privacy, and maintains confidentiality. This is especially important if your assistant will handle sensitive information.
Step 8: Continuous Learning and Updating The AI field is rapidly evolving. Keep your GPT assistant up-to-date with the latest developments, and continuously feed it new information to maintain its relevance and effectiveness.
Conclusion
Creating your own GPT assistant is a journey of blending technology with personal touch. With the steps outlined above, you can embark on this journey, crafting an assistant that not only enhances productivity but also resonates with your personal or professional ethos.
Remember, the key to a successful GPT assistant lies in the details. Take the time to understand its capabilities, tailor its functions to your needs, and you’ll have a powerful tool at your disposal that is as unique as your fingerprint.
Use the images provided as visual guides to inspire your creation process, understanding that each interface may differ, but the underlying principles of personalization and detailed configuration remain the same. Happy creating!
💡 Want more AI insights?
Explore our full collection of AI articles— from ChatGPT tutorials and prompt engineering to productivity hacks and tool comparisons. Whether you’re a beginner or looking to automate more of your work, there’s plenty to discover.